How to Read a Display Prop Design Plan: Measure the Goods, Study the Counter, Then Match the Light陈列道具设计方案怎么读:先量货、再看柜、后对灯
When outfitting a counter with display props, most shops start at the wrong end: pick the best-looking style first. But a plan is only as good as the order you read it in — measure the goods, study the counter, then match the light. Work through those three steps and the real quality of the plan shows itself, and you avoid most of the classic pitfalls.
Measure the goods first. Props exist to serve the stock: length, width, height, weight and quantity decide the size and density of every slot. Do rings, pendants and studs share one tray or get separated? Do bead strands lie flat or hang? How many hero pieces and how many run-of-the-mill pieces go in the case? All of it must line up with the plan. I once saw a beautiful drawing fall apart at the counter: ring grooves too shallow, the pieces rattling around; stud plates punched too tight, two rows of goods colliding. So read the slot chart against your own stock list, item by item: single slot or double, groove width, enough depth — does the piece sit snug or does it wobble? Stock is a moving target, half the quantity in slow season, double in season. Leave about one third of the slots adjustable, never seal the whole layout shut.
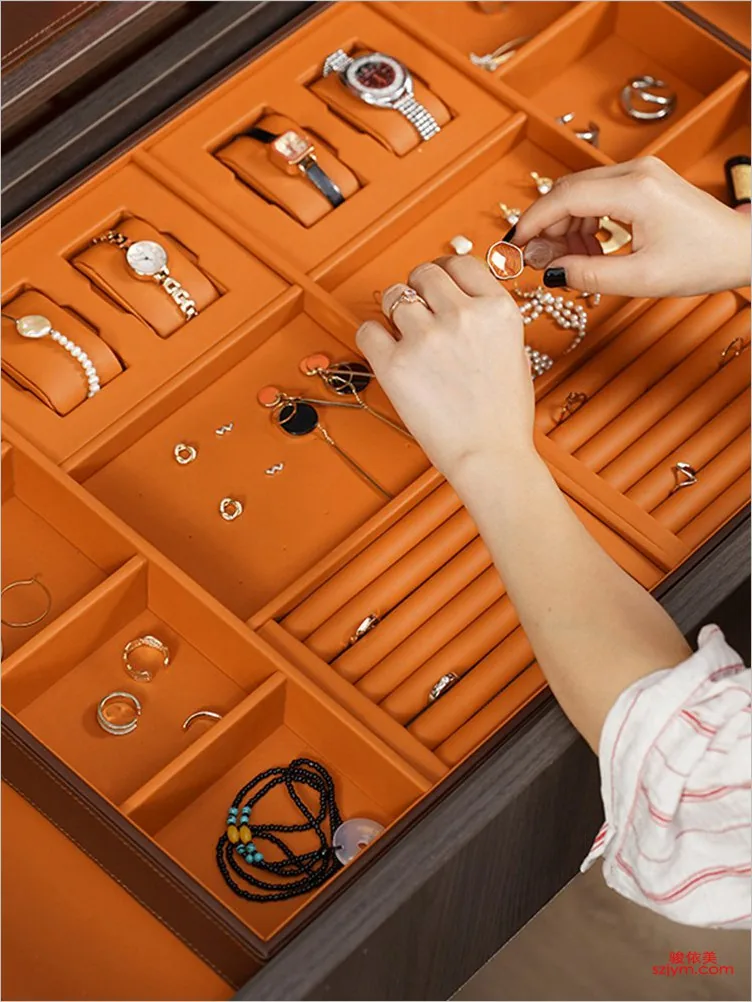
Study the counter second. The same prop is a completely different animal in a low 27-centimeter counter versus a tall display case. Check whether the plan is drawn against your real counter dimensions: usable width and depth of the top, shelf spacing that can actually take the prop, light strips and pillars that eat into the space. The most practical test: overlay the prop outlines on a top view of the counter. Is there enough breathing room around the edges? Does the take-out direction feel natural? Is anything stacked where the staff cannot reach? Good plans even note load limits — an acrylic shelf spanning too far without a reinforcing beam will bow under a full load of gold. That level of detail is where craftsmanship shows.
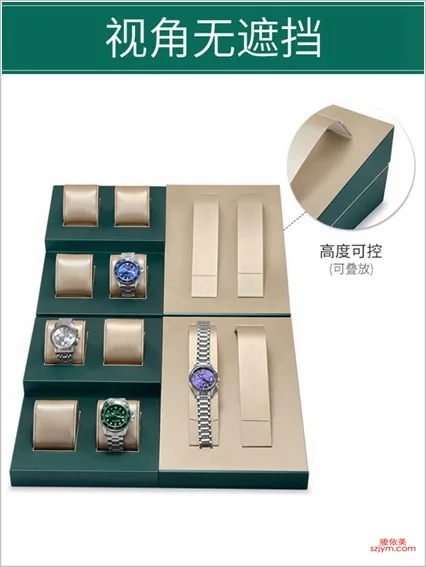
Match the light last. Lighting is half the parent of a prop; any plan that never mentions it loses points on the spot. Check three things: first, do the angles and surfaces face the main light — a raised ring face catching glare is white and useless; second, how the velvet absorbs light, dark velvet eats it, light velvet bounces it, the same lamp on charcoal velvet versus high-gloss white reads a full grade apart; third, whether the light positions exist — is there a light slot above the display zone, can it light the goods without washing them out? Light and props are designed as a pair; fix the light first, then the angles, and the effect follows.
Measure the goods, study the counter, match the light — these three steps simply walk the plan from paper into the counter ahead of time. The one who walks it first does not lose: goods fit, counter takes it, light makes it shine. Only then comes sampling — white model first, velvet after, never skip a step.
给店里定一套陈列道具,很多人第一步就错了——上来先挑样式,看哪个好看选哪个。其实一套方案拿在手里,好不好,得按顺序读:先量货,再看柜,后对灯。这三步读完了,方案的成色基本就出来了,踩坑的概率能少一大半。
先说量货。道具是给货服务的,货的长宽高、重量、数量,决定格位的尺寸和密度。戒指、吊坠、耳钉是分开放还是混放,串珠是平铺还是挂起来,柜里要摆几件主推、几件跑量——这些都得在方案里对得上。我见过一份方案画得漂漂亮亮,结果客人拿货的时候,戒指槽做浅了,货放进去晃;耳钉板开孔开密了,两排货打架。所以读方案第一步,就是拿自家货单对着方案里的格位表一项项核:单槽还是双槽、槽宽多少、深度够不够,货放进去是刚好卡住还是能晃。货量是动态的,旺季淡季差一半,方案里最好留出三分之一的可调格位,别一封死到底。
第二步看柜。同样一件道具,放进二十七厘米深的矮柜台和放进取样式的高展柜,完全是两回事。要看方案有没有贴着柜台尺寸做:台面可用长宽是多少、层板间距能不能塞进这套道具、背后有没有灯带和立柱占位置。最实在的办法,是把方案里的道具外轮廓叠到柜台俯视图上看一遍:四周留白够不够,取放方向顺不顺手,店员伸手够不着的地方有没有堆货。有的方案还会标出承重,亚克力层板跨度过大、中间不加重梁,放满黄金首饰会压弯,这种细节最见功底。
最后对灯。灯光是道具的半个爹,方案里不聊光的,直接减分。要看三件事:一是道具的角度和光的关系,斜面、立面的朝向是不是迎着主光源,戒面会不会反光白花花一片;二是绒面的吸光性,深色绒吃光,浅色绒反光,同样的灯打到深灰绒和高光白绒上,货的质感差一个档次;三是灯位够不够,展示位上方有没有预留灯槽,能不能打亮而不打晕。灯光和道具是配套设计的,先定灯再定道具的角度,效果才出得来。
量货、看柜、对灯,这三步其实就是把方案从纸面搬到柜台里预先走一遍。走在前面的人不吃亏——货对得上、柜放得下、灯打得亮,这套方案才算真正读懂了。接下来就是打样,白模试完再上绒,一步都别省。
读方案还有一步很多人省了——把方案讲给每天守柜台的店员听一遍。设计师看方案看的是图和尺寸,店员看方案看的是顺手不顺手:哪个格子天天要用、哪个托盘每天要端进端出、哪个抽屉客人老爱拉开。让店员拿着方案在柜台边比划一遍,说得出"这个高度我够得着""这个格位我取放顺手"的方案,才是能落地的方案;店员看了直皱眉的地方,趁早让厂家改,别等上了柜再返工。
另外,一份经得起读的方案,除了图,还得有这几样:尺寸公差——格位宽度允许零点五毫米还是一毫米的浮动,写死了验收才有依据;材质批次——绒布色号、板材厚度、五金件型号列成清单,避免厂家用接近色糊弄;配件与替换件——灯带、合页、绒面这类易耗件,方案里最好写明型号和替换方法,用两年之后好补货。图好看是面子,这些白纸黑字才是里子。
最后说一句实在的:读方案最好的时机,是下单之前而不是到货之后。到货再发现格位对不上货、柜摆放不下,改一块是一块的价钱,还耽误上柜。量货、看柜、对灯这读三遍的功夫,花在订单确认前,省的是后面退货、改版、翻工的整个周期。货单随身带,柜台尺寸拍了照片存在手机里,灯位灯型记下来,读方案的时候一一对着过,比什么速成技巧都管用。
方案读三遍删三遍,留下的才是真需求:货单量过、柜台量过、灯位记过,剩下的问题才是真问题。别嫌麻烦,柜台的每一寸空间都值钱,方案早一天读透、改透、定透,生意就早一天上正轨,返工的钱也就早一天省下来。