The made-to-measure logic of display props: measure the counter first, design after道具的定做逻辑:先量柜台,再谈设计
Most shops buy display props like this: look at a picture, place an order, unpack, and put them out — as long as the style looks right, that is enough. But once the prop reaches the counter, the height is off by a notch, or the width is a little too much, or the goods rattle in empty space, and only then does anyone realize nobody measured the counter first. A prop is furniture made for a counter, not a decoration moved in at random — measure the counter first, design after. Skipping this step saves a few minutes today and costs a full year of awkwardness.
Start with what to measure. The counter's usable length and width come first: most countertops are not one clean slab — pillars, glass, and light strips take their share, so measure the "real space where goods can sit." Second are the heights: how far the display position is from the floor, from the customer, and from the staff — three numbers to note together. Third are depth and shelf pitch: inner drawer depth, the gaps between display shelves, and the cable slit at the back decide whether a prop sits flush or floats in midair. Fourth and most often missed is light: where the spots are, what temperature, which area they hit — prop color and tilt both have to follow the light.
Once measured, list the jobs. Is a given surface a try-on zone where goods are handed to people, a display zone where people look, or a temporary spot near the till? Different job, different design. Try-on zones need to take abuse: wide-mouth trays, heavy bases, smooth pick-up and put-down. Display zones need to perform: stands angled and heighted for the customer's line of sight. Temp zones need to stay out of the way: small surfaces, quick to clear, never eating the main counter. Write down what each surface has to do, and the prop shopping list writes itself.
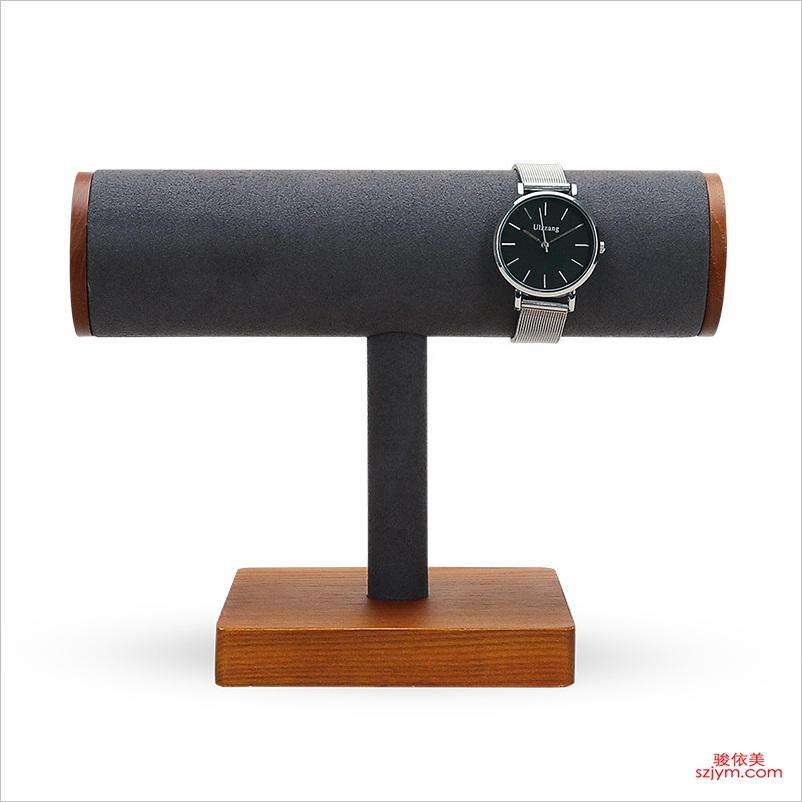 Next come goods and cells. Bangles want thick-velvet troughs so they rest flat without strain; rings want slanted slots so faces read at once; earrings want upright positions, one pair per spot, never tangled; necklaces want length to hang, with pendants clearing the dividers. One type of goods, one type of cell — calculated from how customers handle them, not from how the owner likes the look. Spacing between cells follows the goods too: high-end, diamond-set pieces get wider cells so reaching hands never shake; volume plain bands can sit denser, more pieces per screen.
A prop's "angle" is the invisible design. Flat is for looking; slanted is for taking: tilt the tray face ten to fifteen degrees forward so ring faces and gem tables "look up" at the customer, seen whole without touching; staff-side pick positions tilt the other way, inward, so standing reach is effortless. Angles are not whims — they open separate lanes for "seeing" and "taking," and one angle serving both actions is what design means.
Material follows the scene. High-touch try-on zones want wear-resistant, easy-care velvet and leather; photogenic display zones want grain and metal with presence; corner spots that take knocks want rounded, thick-rimmed pieces. The same goods on matte black velvet and on glossy lacquered wood are two different price points; material is the prop's tone of voice — whatever your counter wants to say, the material says it first.
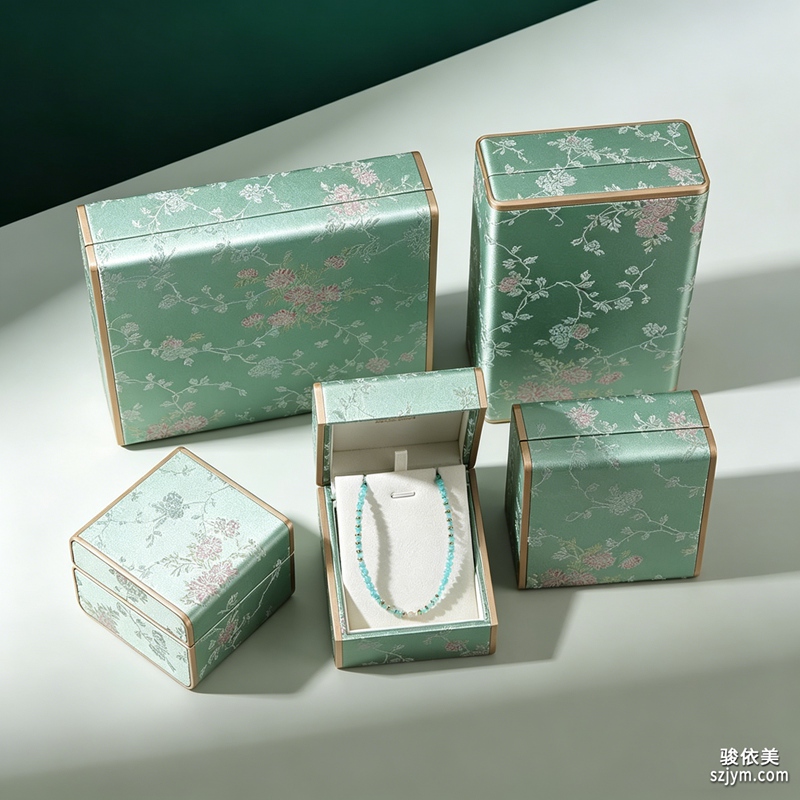 Custom work also has a time budget. Sampling, confirmation, production, and shipping — a full custom set runs two to four weeks from order to counter. In a hurry, hero zones can start with off-the-shelf pieces while the custom set is made; the payoff of custom is one-and-done — size, cells, angles all match the counter, arriving ready to use instead of "make do." Most shops do not need a full custom set anyway: custom-make the three places that earn the most (hero position, try-on position, corner position) and fill the rest with stock pieces. Money lands where the effect lands.
Talking to the factory has a script too. On the drawing, beyond length and width, write three things: the largest goods dimension, the regular customer-to-counter distance, and the shop's lighting situation. With those three lines, the factory knows how deep cells should be, how steep angles should go, and how bright colors should run. Too many orders communicate one photo and come back too shallow or too dark — state the sizes and the use, and the prop is genuinely "made to measure."
Do the budget math up front. A custom single piece costs thirty to fifty percent more than stock, but what you save is the "replacement tax": wrong stock gets returned, re-shipped, re-staged — the hassle easily costs more than the custom difference. A smarter plan is "custom-sample one, batch-fill the rest": make one custom prop for the hero zone, see it live, and only then bulk-order the same spec — consistency of style, small risk.
Counters grow. Seasons, hero lines, and foot traffic all shift, so design in "variables": cells that detach, shelves that adjust, colors that swap — prefer those. What you custom-make is not a dead object but a skeleton that grows with the counter. Skeleton right, and any goods hold up; skeleton wrong, and no amount of restocking helps.
At bottom, the made-to-measure logic is one sentence: ask what the counter has to do, then decide what the prop looks like. Sizes measured and kept in mind, jobs listed on paper, angles tuned by hand, materials chosen in plain sight — walk these four steps and the prop truly becomes the counter's other half.
This is original content. Copyright belongs to Shenzhen Junyimei. Please indicate the source when reposting.
Junyimei — presenting every piece of jewelry and watch at its best.很多店买陈列道具,流程是"看图片、下单、到货、摆上",觉得样式顺眼就够了。可柜台收回来后,要么高度差一截、要么宽度多一块、要么货放进去空荡荡,才想起来当初没人量过柜台的尺寸。道具是给柜台"定做"的家具,不是随手搬来的摆设——先量柜台,再谈设计,这一步省不掉的功夫,能省下后面一整年的别扭。 先说量什么。台面长宽是第一项:一张柜台的可用台面往往不是整块,中间可能立着柱子、压着玻璃、嵌着灯带,量出"实际能摆货的长宽"才算数。第二项是高度差:柜台放道具的位置,离地多少、离顾客多高、离店员多高,三组数字要一起记。第三项是深度和层高:抽屉内深、展柜层板的间距、背面留的走线缝,决定道具是"严丝合缝"还是"浮在半空"。第四项最容易漏——灯光:射灯在哪、色温多少、主光照哪一块,道具的颜色和倾斜角都要跟着光走。 量完尺寸,下一步是列任务清单。一块台面,是给人递货的试戴区,还是给人看的陈列区,还是收银时的暂放区?任务不同,设计完全不同。试戴区要"耐折腾":托盘开口大、底座稳,客人拿出来放回去都顺;陈列区要"出效果":架子高度、角度都朝顾客的视线用劲;暂放区要"不碍事":盘面小、收起来快,不占主台面的地方。把每块台面要干的活写下来,道具的清单就自己长出来了。
再往后是"货"和"格"的匹配。手镯类要厚绒凹槽,镯子横躺着不吃力;戒指类要斜放槽,戒面朝斜上方一眼看得全;耳饰类要立挂位,一对对分开不勾挂;项链类要给长度留空间,坠子垂下来不扫到隔板。每一类货配一类格,是按客人的拿取习惯算的,不是按店主的审美算的。格与格之间留多少空,也跟货走:价位高的、镶钻的,格子放宽,取的时候手不抖;走量的素圈,格子密一点,一屏多摆几件。
道具的"角度"是看不见的设计。平放是给人看的,斜放是给人拿的:托盘面微微前倾十到十五度,戒面、宝石面都朝顾客"抬头",顾客不用上手就能看到全貌;给店员用的取货位则相反,微微内倾,站着取货手不累。角度不是随心所欲的摆设,是给"看"和"拿"两种动作各留的通道——一个角度两头服务,设计才算到位。
材料也跟着场景定。天天被摸的试戴区,用耐磨、好打理的绒面和皮面;上镜的陈列区,用木纹、金属这类有质感的材质;容易被磕碰的转角位,选圆角、厚边的款。同一种货,放在哑光黑绒上和放在亮面漆木上,是两个身价;材料是道具的"语气",柜台想说什么调子,材料先替你说了。
定做还要算时间账。打样、确认、量产、运输,一套定制道具从下单到上柜,通常要两到四周。急用的主推区可以先上成品款过渡,定制款慢慢做;定制的好处是一次到位——尺寸、格数、角度都按柜台来,来了就能用,不用再"凑合"。大多数店其实用不着全套定制:把最容易出效果的三个位置(主推位、试戴位、转角位)定做,其余用成品补齐,钱花在刀刃上,效果也出在刀刃上。
定制的沟通也有路数。给工厂的图纸上,除了长宽高,还要写清三点:货品的最大件尺寸、顾客与柜台的常规距离、店内的灯光情况。这三条写清楚,工厂才知道格位该留多深、角度该放多陡、颜色该选多亮。见过太多沟通只发一张图片的订单,回来不是浅了就是暗了——尺寸和用途说明白,道具才真是"定做"的。
预算的账也要算在前面。定制单件比成品贵三到五成,但省的是"替换费":成品不合适,退回重买、来回运费、拆了重摆,折腾的成本早超过定制差价。更划算的打法是"定制打样一件,成品批量补齐":先定做一件主推区的道具,看实际效果,满意了再按同一规格批量下单,风格统一,风险又小。
柜台是会长大的。淡旺季、主推品、客流动线都会变,道具设计时要留"变数":格位能拆的、层板能调的、颜色好换的,优先考虑。定做的不是一件死物,是一套能跟着柜台"长"的骨架——骨架对了,货怎么换都撑得住;骨架不对,换再多货也是白搭。
说到底,道具定做的逻辑就一句话:先问柜台要干什么,再决定道具长什么样。尺寸量在心里,任务列在纸上,角度调在手上,材料选在明面上——这四步走完,道具才真正是柜台的"另一半"。
本文为原创内容,版权归深圳骏依美所有。如需转载请注明出处。
骏依美——让每一件珠宝与腕表,都被更好地呈现。
Next come goods and cells. Bangles want thick-velvet troughs so they rest flat without strain; rings want slanted slots so faces read at once; earrings want upright positions, one pair per spot, never tangled; necklaces want length to hang, with pendants clearing the dividers. One type of goods, one type of cell — calculated from how customers handle them, not from how the owner likes the look. Spacing between cells follows the goods too: high-end, diamond-set pieces get wider cells so reaching hands never shake; volume plain bands can sit denser, more pieces per screen.
A prop's "angle" is the invisible design. Flat is for looking; slanted is for taking: tilt the tray face ten to fifteen degrees forward so ring faces and gem tables "look up" at the customer, seen whole without touching; staff-side pick positions tilt the other way, inward, so standing reach is effortless. Angles are not whims — they open separate lanes for "seeing" and "taking," and one angle serving both actions is what design means.
Material follows the scene. High-touch try-on zones want wear-resistant, easy-care velvet and leather; photogenic display zones want grain and metal with presence; corner spots that take knocks want rounded, thick-rimmed pieces. The same goods on matte black velvet and on glossy lacquered wood are two different price points; material is the prop's tone of voice — whatever your counter wants to say, the material says it first.
Custom work also has a time budget. Sampling, confirmation, production, and shipping — a full custom set runs two to four weeks from order to counter. In a hurry, hero zones can start with off-the-shelf pieces while the custom set is made; the payoff of custom is one-and-done — size, cells, angles all match the counter, arriving ready to use instead of "make do." Most shops do not need a full custom set anyway: custom-make the three places that earn the most (hero position, try-on position, corner position) and fill the rest with stock pieces. Money lands where the effect lands.
Talking to the factory has a script too. On the drawing, beyond length and width, write three things: the largest goods dimension, the regular customer-to-counter distance, and the shop's lighting situation. With those three lines, the factory knows how deep cells should be, how steep angles should go, and how bright colors should run. Too many orders communicate one photo and come back too shallow or too dark — state the sizes and the use, and the prop is genuinely "made to measure."
Do the budget math up front. A custom single piece costs thirty to fifty percent more than stock, but what you save is the "replacement tax": wrong stock gets returned, re-shipped, re-staged — the hassle easily costs more than the custom difference. A smarter plan is "custom-sample one, batch-fill the rest": make one custom prop for the hero zone, see it live, and only then bulk-order the same spec — consistency of style, small risk.
Counters grow. Seasons, hero lines, and foot traffic all shift, so design in "variables": cells that detach, shelves that adjust, colors that swap — prefer those. What you custom-make is not a dead object but a skeleton that grows with the counter. Skeleton right, and any goods hold up; skeleton wrong, and no amount of restocking helps.
At bottom, the made-to-measure logic is one sentence: ask what the counter has to do, then decide what the prop looks like. Sizes measured and kept in mind, jobs listed on paper, angles tuned by hand, materials chosen in plain sight — walk these four steps and the prop truly becomes the counter's other half.
This is original content. Copyright belongs to Shenzhen Junyimei. Please indicate the source when reposting.Junyimei — presenting every piece of jewelry and watch at its best.很多店买陈列道具,流程是"看图片、下单、到货、摆上",觉得样式顺眼就够了。可柜台收回来后,要么高度差一截、要么宽度多一块、要么货放进去空荡荡,才想起来当初没人量过柜台的尺寸。道具是给柜台"定做"的家具,不是随手搬来的摆设——先量柜台,再谈设计,这一步省不掉的功夫,能省下后面一整年的别扭。 先说量什么。台面长宽是第一项:一张柜台的可用台面往往不是整块,中间可能立着柱子、压着玻璃、嵌着灯带,量出"实际能摆货的长宽"才算数。第二项是高度差:柜台放道具的位置,离地多少、离顾客多高、离店员多高,三组数字要一起记。第三项是深度和层高:抽屉内深、展柜层板的间距、背面留的走线缝,决定道具是"严丝合缝"还是"浮在半空"。第四项最容易漏——灯光:射灯在哪、色温多少、主光照哪一块,道具的颜色和倾斜角都要跟着光走。 量完尺寸,下一步是列任务清单。一块台面,是给人递货的试戴区,还是给人看的陈列区,还是收银时的暂放区?任务不同,设计完全不同。试戴区要"耐折腾":托盘开口大、底座稳,客人拿出来放回去都顺;陈列区要"出效果":架子高度、角度都朝顾客的视线用劲;暂放区要"不碍事":盘面小、收起来快,不占主台面的地方。把每块台面要干的活写下来,道具的清单就自己长出来了。
再往后是"货"和"格"的匹配。手镯类要厚绒凹槽,镯子横躺着不吃力;戒指类要斜放槽,戒面朝斜上方一眼看得全;耳饰类要立挂位,一对对分开不勾挂;项链类要给长度留空间,坠子垂下来不扫到隔板。每一类货配一类格,是按客人的拿取习惯算的,不是按店主的审美算的。格与格之间留多少空,也跟货走:价位高的、镶钻的,格子放宽,取的时候手不抖;走量的素圈,格子密一点,一屏多摆几件。
道具的"角度"是看不见的设计。平放是给人看的,斜放是给人拿的:托盘面微微前倾十到十五度,戒面、宝石面都朝顾客"抬头",顾客不用上手就能看到全貌;给店员用的取货位则相反,微微内倾,站着取货手不累。角度不是随心所欲的摆设,是给"看"和"拿"两种动作各留的通道——一个角度两头服务,设计才算到位。
材料也跟着场景定。天天被摸的试戴区,用耐磨、好打理的绒面和皮面;上镜的陈列区,用木纹、金属这类有质感的材质;容易被磕碰的转角位,选圆角、厚边的款。同一种货,放在哑光黑绒上和放在亮面漆木上,是两个身价;材料是道具的"语气",柜台想说什么调子,材料先替你说了。
定做还要算时间账。打样、确认、量产、运输,一套定制道具从下单到上柜,通常要两到四周。急用的主推区可以先上成品款过渡,定制款慢慢做;定制的好处是一次到位——尺寸、格数、角度都按柜台来,来了就能用,不用再"凑合"。大多数店其实用不着全套定制:把最容易出效果的三个位置(主推位、试戴位、转角位)定做,其余用成品补齐,钱花在刀刃上,效果也出在刀刃上。
定制的沟通也有路数。给工厂的图纸上,除了长宽高,还要写清三点:货品的最大件尺寸、顾客与柜台的常规距离、店内的灯光情况。这三条写清楚,工厂才知道格位该留多深、角度该放多陡、颜色该选多亮。见过太多沟通只发一张图片的订单,回来不是浅了就是暗了——尺寸和用途说明白,道具才真是"定做"的。
预算的账也要算在前面。定制单件比成品贵三到五成,但省的是"替换费":成品不合适,退回重买、来回运费、拆了重摆,折腾的成本早超过定制差价。更划算的打法是"定制打样一件,成品批量补齐":先定做一件主推区的道具,看实际效果,满意了再按同一规格批量下单,风格统一,风险又小。
柜台是会长大的。淡旺季、主推品、客流动线都会变,道具设计时要留"变数":格位能拆的、层板能调的、颜色好换的,优先考虑。定做的不是一件死物,是一套能跟着柜台"长"的骨架——骨架对了,货怎么换都撑得住;骨架不对,换再多货也是白搭。
说到底,道具定做的逻辑就一句话:先问柜台要干什么,再决定道具长什么样。尺寸量在心里,任务列在纸上,角度调在手上,材料选在明面上——这四步走完,道具才真正是柜台的"另一半"。
本文为原创内容,版权归深圳骏依美所有。如需转载请注明出处。骏依美——让每一件珠宝与腕表,都被更好地呈现。